How to Build Custom Pieces in Activepieces (CLI, Auth, Actions, and Triggers)
Your team runs on a niche internal tool, and Activepieces has no piece for it. Every flow that touches that tool starts with a webhook plus a Code step full of hand-rolled fetch calls, and every time the API changes, three flows break in three different ways. This article fixes that by turning the integration into a real piece: one typed package, one auth definition, reusable actions and triggers that any teammate can drop into a flow.
Quick answer
Scaffold a piece with npm run cli pieces create, add auth with PieceAuth, write actions with createAction and triggers with createTrigger, test it locally with AP_DEV_PIECES, then build a .tgz archive and install it from the Pieces page.
The hard part is not the TypeScript, it is getting the piece to load in your local instance and matching the API’s auth and pagination behavior, because the builder stays silent instead of telling you what went wrong.
Checked on 2026-11-10 against the official Activepieces piece-building tutorial and the Activepieces repository on GitHub. Interfaces change fast, so if a menu or label differs, trust the linked page.
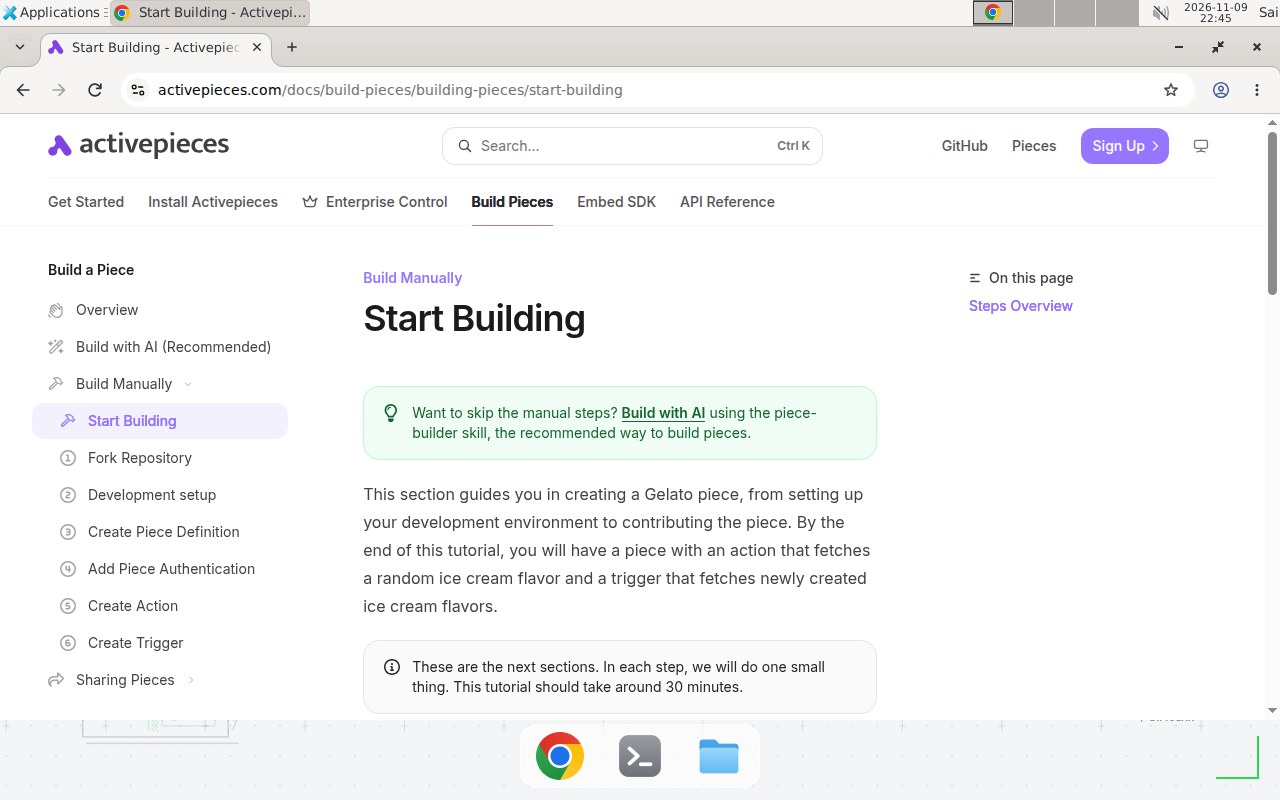
The official Activepieces piece-building tutorial. Screenshot, checked 2026-11-10.
Evidence: why a piece beats a pile of Code steps
Activepieces is an open-source automation platform whose integrations are TypeScript npm packages, and the project describes its framework as a “type-safe pieces framework written in TypeScript.” That typing is the whole point of building a piece instead of pasting fetch calls into Code steps: the props, auth, and outputs are declared once, validated by the compiler, and reused by every flow.
The numbers make the case for building in the open. The repository had 25,451 GitHub stars and 4,446 forks when checked on 2026-11-10, the README states that 60% of pieces are contributed by the community, and all 280+ pieces are available as MCP servers, so a piece you write is callable from Claude Desktop, Cursor, or Windsurf as well as from flows. Activepieces also pays contributors in product: the docs say a piece accepted into the repo earns +1,400 tasks per month on Activepieces Cloud.
The docs are explicit about the fastest route. “The fastest way to build an Activepieces piece is the piece-builder skill,” the build with AI page says, and the skill lives in the repository at .agents/skills/piece-builder. This article walks the manual path so you understand what the skill generates.
Your API ──> piece package (auth + actions + triggers)
                 │
                 ├─> flow builder: anyone drags the action into a flow
                 ├─> .tgz archive: install on any instance from Pieces page
                 └─> MCP server: callable from Claude Desktop / Cursor
Prerequisites
- Node.js v22.15 or newer, or v24, and npm v9 or newer.
- A GitHub account, so you can fork the Activepieces repository.
- Basic TypeScript: reading function signatures and object literals is enough.
- A local Activepieces development instance, or a Cloud account for testing the finished piece.
- An API to integrate, with its docs open. The walkthrough below uses the docs’ Gelato demo, an ice cream API with one API key, so you can follow every step without a real account.
Step 1: Fork and clone the repository
Fork activepieces/activepieces on GitHub, then clone your fork and enter the directory:
git clone https://github.com/YOUR-USERNAME/activepieces.git
cd activepieces
Replace YOUR-USERNAME with your GitHub username. Example, replace with your values.
Step 2: Start the local development environment
The development setup page lists Node.js v22.15+ or v24 and npm v9+ as prerequisites, then two commands:
node tools/setup-dev.js
npm start
npm start boots Activepieces with PGLite and an in-memory queue, the lightweight setup the docs recommend for piece development. Open localhost:4200 and sign in with the development credentials from the docs: email dev@activepieces.com, password 12345678.
By default the development setup only builds specific pieces. Open .env.dev at the repository root and add the piece you are building to AP_DEV_PIECES, for example:
AP_DEV_PIECES=gelato npm start
You can list several pieces separated by commas. Every time you edit that variable, restart the backend and refresh the frontend, or the new piece will not appear.
Step 3: Scaffold the piece
Run the piece generator from the repository root:
npm run cli pieces create
It asks three questions. The piece definition page shows the Gelato answers:
npm run cli pieces create
? Enter the piece name: gelato
? Enter the package name: @activepieces/piece-gelato
? Select the piece type: community
Pick community when the integration is meant to be shared, and custom when it is tailored to your own needs. The generator creates the piece at packages/pieces/community/gelato/, and src/index.ts starts like this:
import { PieceAuth, createPiece } from '@activepieces/pieces-framework';

export const gelato = createPiece({
  displayName: 'Gelato',
  description: '',
  logoUrl: 'https://cdn.activepieces.com/pieces/gelato.png',
  auth: PieceAuth.None(),
  minimumSupportedRelease: '0.36.1',
  authors: [],
  actions: [],
  triggers: [],
});
That single object is the piece’s contract: display name, logo, auth, and the lists of actions and triggers you will fill in next.
Step 4: Add authentication
Most real APIs need a key, and the docs’ Gelato example uses one. Edit src/index.ts to define the auth before the piece, using the piece authentication page as the reference:
import { PieceAuth, createPiece } from '@activepieces/pieces-framework';

export const gelatoAuth = PieceAuth.SecretText({
  displayName: 'API Key',
  required: true,
  description: 'Please use **test-key** as value for API Key',
});

export const gelato = createPiece({
  displayName: 'Gelato',
  logoUrl: 'https://cdn.activepieces.com/pieces/gelato.png',
  auth: gelatoAuth,
  authors: [],
  actions: [],
  triggers: [],
});
Then set auth: gelatoAuth on the piece. The docs use the value test-key when testing the Gelato actions and triggers, so use that literal value in the connection form while you develop. PieceAuth.SecretText is only one of several auth types: the framework also supports OAuth2, Basic auth, and custom auth, and the right choice is whatever the target API actually issues. We could not verify the full list of auth types from the tutorial pages alone; vendor docs say the piece reference authentication page lists them, so check there before picking OAuth2 for a real integration.
Step 5: Create an action
An action is one operation a flow can run, such as fetching a random flavor. Generate it with the CLI:
npm run cli actions create
It asks for the piece folder name, the action display name, and a short description. For Gelato that creates packages/pieces/community/gelato/src/lib/actions/get-icecream-flavor.ts. The create action page describes the shape: createAction takes name, displayName, description, props, and a run function, and run receives a context holding the property values. A minimal action following that documented shape looks like this:
import { createAction, Property } from '@activepieces/pieces-framework';
import { httpClient, HttpMethod } from '@activepieces/pieces-common';
import { gelatoAuth } from '../../';

export const getIcecreamFlavor = createAction({
  auth: gelatoAuth,
  name: 'getIcecreamFlavor',
  displayName: 'Get Random Flavor',
  description: 'Fetch a random ice cream flavor.',
  props: {
    flavorCount: Property.Number({
      displayName: 'Number of flavors',
      required: false,
      defaultValue: 1,
    }),
  },
  async run(context) {
    const response = await httpClient.sendRequest({
      method: HttpMethod.GET,
      url: 'https://api.gelato.example/v1/flavors/random',
      headers: {
        authorization: context.auth.secret_text,
      },
      queryParams: {
        count: context.propsValue.flavorCount?.toString() ?? '1',
      },
    });
    return response.body;
  },
});
The URL above is an example, replace with your values: it stands in for the real Gelato endpoint, which the docs host behind a demo webhook. The structure is what matters, and it is the documented one: auth from the connection, props from the user, one httpClient.sendRequest call, and the response body returned as the step output. Expose the action in the piece definition:
import { getIcecreamFlavor } from './lib/actions/get-icecream-flavor';

export const gelato = createPiece({
  // ... displayName, logoUrl, auth ...
  actions: [getIcecreamFlavor],
  triggers: [],
});
If the action does not show up in the flow builder, you almost certainly skipped this array, not the code.
Step 6: Create a polling trigger
A trigger starts a flow when something happens. The docs’ Gelato trigger fires when a new flavor is created, using polling, and the create trigger page gives the full file. Generate it first:
npm run cli triggers create
npm run cli triggers create
? Enter the piece folder name : gelato
? Enter the trigger display name : new flavor created
? Enter the trigger description : triggers when a new icecream flavor is created.
? Select the trigger technique: polling
That creates packages/pieces/community/gelato/src/lib/triggers/new-flavor-created.ts. The polling strategy fetches the flavor list, maps each entry to an item with a timestamp, and deduplicates by time:
import { gelatoAuth } from '../../';
import {
  DedupeStrategy,
  HttpMethod,
  HttpRequest,
  Polling,
  httpClient,
  pollingHelper,
} from '@activepieces/pieces-common';
import {
  TriggerStrategy,
  createTrigger,
  AppConnectionValueForAuthProperty,
} from '@activepieces/pieces-framework';
import dayjs from 'dayjs';

const polling: Polling<
  AppConnectionValueForAuthProperty<typeof gelatoAuth>,
  Record<string, never>
> = {
  strategy: DedupeStrategy.TIMEBASED,
  items: async ({ auth, propsValue, lastFetchEpochMS }) => {
    const request: HttpRequest = {
      method: HttpMethod.GET,
      url: 'https://cloud.activepieces.com/api/v1/webhooks/aHlEaNLc6vcF1nY2XJ2ed/sync',
      headers: {
        authorization: auth.secret_text,
      },
    };
    const res = await httpClient.sendRequest(request);
    return res.body['flavors'].map((flavor: string) => ({
      epochMilliSeconds: dayjs().valueOf(),
      data: flavor,
    }));
  },
};

export const newFlavorCreated = createTrigger({
  auth: gelatoAuth,
  name: 'newFlavorCreated',
  displayName: 'new flavor created',
  description: 'triggers when a new icecream flavor is created.',
  props: {},
  sampleData: {},
  type: TriggerStrategy.POLLING,
  async test(context) {
    return await pollingHelper.test(polling, context);
  },
  async onEnable(context) {
    await pollingHelper.onEnable(polling, context);
  },
  async onDisable(context) {
    await pollingHelper.onDisable(polling, context);
  },
  async run(context) {
    return await pollingHelper.poll(polling, context);
  },
});
The webhook URL is the docs’ own demo endpoint, copied verbatim. In your own piece, replace it with your API’s list endpoint and return each record with a stable timestamp or ID, or the trigger refires the same items.
Polling runs every 5 minutes by default. Wire the trigger into the piece definition:
import { newFlavorCreated } from './lib/triggers/new-flavor-created';

export const gelato = createPiece({
  // ... displayName, logoUrl, auth ...
  actions: [getIcecreamFlavor],
  triggers: [newFlavorCreated],
});
Choose polling when the API has a list endpoint and no webhooks, and a webhook trigger when the API can push events to you. Webhook triggers need a public URL for local testing: the docs suggest exposing localhost:4200 through a tunnel such as localxpose and pointing AP_FRONTEND_URL at it.
Step 7: Test the piece in the flow builder
With AP_DEV_PIECES=gelato set and the backend restarted, open the flow builder at localhost:4200, create a flow, and add the Gelato piece. Run the action with the test-key connection and read the real response. For the trigger, use the builder’s load sample data button, then publish the flow and watch one real poll cycle.
Do not skip the poll cycle: a trigger that returns the same items on every poll spams your flow every 5 minutes, and the only symptom is duplicate runs in the history.
Step 8: Build, package, and share
When the piece works, build it into a distributable archive. The CLI scans packages/pieces/ for the piece name in package.json, compiles it, and exports a .tgz archive:
npm run build-piece
Install a built piece from the Pieces page by choosing Add Piece and either giving the npm package details or uploading the tar file directly. That is the path for private pieces your team uses but never publishes.
To publish a piece to a running instance instead, run npm run publish-piece-to-api, which asks for the piece folder name, the API URL such as https://cloud.activepieces.com/api, and an API key source. Generate the key from the admin interface under Settings first, and prefer the AP_API_KEY environment variable over pasting the key by hand.
Contributing to the public repo is the third option, and it is the only one that pays: an accepted piece earns +1,400 tasks per month on Activepieces Cloud. Open a pull request from your fork, and before you do, run the build and the linter, and bump the version in package.json.
Copy-paste template: a generic REST action starter
Use this file as the starting point for any read-only API action. It is written for this article, not copied from the docs.
// File: packages/pieces/community/<your-piece>/src/lib/actions/list-items.ts
// Example values below, replace with your values.
import { createAction, Property } from '@activepieces/pieces-framework';
import { httpClient, HttpMethod } from '@activepieces/pieces-common';
import { yourPieceAuth } from '../../';

export const listItems = createAction({
  auth: yourPieceAuth,
  name: 'listItems',
  displayName: 'List Items',
  description: 'List items from the API, newest first.',
  props: {
    limit: Property.Number({
      displayName: 'Limit',
      description: 'How many items to return. The API caps this at 100.',
      required: false,
      defaultValue: 10,
    }),
    search: Property.ShortText({
      displayName: 'Search',
      description: 'Optional text filter, matched against the item name.',
      required: false,
    }),
  },
  async run(context) {
    const response = await httpClient.sendRequest({
      method: HttpMethod.GET,
      url: 'https://api.example.com/v1/items',
      headers: {
        authorization: `Bearer ${context.auth.secret_text}`,
      },
      queryParams: {
        limit: context.propsValue.limit?.toString() ?? '10',
        ...(context.propsValue.search
          ? { q: context.propsValue.search }
          : {}),
      },
    });
    // Flatten the response so the next step sees an array, not a wrapper.
    return response.body.items ?? response.body;
  },
});
Three details in that template are deliberate. The limit prop has a default so the action works with zero configuration, and the return flattens response.body.items when the API wraps its list, because a nested wrapper is the most common reason a downstream step shows nothing.
When not to use this / Limits
Do not build a piece for a one-off job. If a single flow needs one API call once, a webhook trigger plus a Code step is faster, and a piece you maintain for one flow is a liability, not an asset. Do not build a piece for an API with no stable contract either: if the vendor renames fields every quarter, your piece becomes a treadmill of version bumps, and a Code step you can edit in place is the honest tool. Pieces also cannot fix a bad API. If the vendor has no list endpoint and no webhooks, a polling trigger can only re-fetch everything and guess what is new, which is slow and noisy. Use a scheduled flow with a Code step that stores the last seen ID in a Store instead, and revisit a piece when the vendor ships webhooks.
Troubleshooting
| Symptom | Likely cause | Command to check | Fix |
|---|---|---|---|
| Piece does not appear in the flow builder | Piece name missing from AP_DEV_PIECES, or backend not restarted | grep AP_DEV_PIECES .env.dev | Add the piece name, restart with npm start, refresh the browser |
| Action returns 401 | Wrong API key, or auth header format the API rejects | Run the same request with curl -H "Authorization: <key>" | Fix the connection value, or switch to the Bearer <key> format the API expects |
| Trigger fires the same items on every poll | No stable timestamp or ID per item, so dedupe cannot tell new from old | Check the epochMilliSeconds each returned item carries | Return a real per-item timestamp or ID from the API response instead of dayjs().valueOf() |
| Build fails with TypeScript errors | Props or context typed against an older framework version | npm run build-piece and read the first error | Align the imports with the current docs page for that file, and keep minimumSupportedRelease current |
| Webhook trigger never fires locally | Local instance is not reachable from the internet | curl https://<your-tunnel-domain> | Expose localhost:4200 with a tunnel, set AP_FRONTEND_URL to it, and re-enable the trigger |
Common mistakes
- Forgetting to register the action or trigger in
src/index.ts. The files compile fine on their own, and nothing warns you. Check theactionsandtriggersarrays after adding a file. - Hardcoding the API key in the action code. Keys belong in the connection, via
context.auth. A hardcoded key ships in the package and breaks the moment it rotates. - Returning the raw nested response. If the API wraps its list in
{ data: [...] }, the next step sees an object instead of an array. Flatten it inrun, as the template above does. - Testing only with the manual run button. Manual runs skip the polling loop, the dedupe logic, and the enable and disable hooks. Publish the flow and watch at least one real 5-minute poll cycle before calling the piece done.
Test before you rely on it
- Run the action with a real connection and confirm the response matches the API docs, not just that it returns 200.
- Run the action with bad credentials and confirm the error message names the auth problem instead of failing silently.
- Publish a flow with the polling trigger and confirm exactly one run per new item across two poll cycles, with no duplicates.
- Disable and re-enable the flow and confirm the trigger resumes without refiring old items.
- Install the built
.tgzon a clean instance and confirm the piece loads and runs there, not only in your dev checkout. - Check the run history after a day and confirm every run carries enough detail to find the failing step without opening the code.
FAQ
Do I need to write TypeScript to build a piece?
Yes, pieces are TypeScript npm packages. You do not need advanced TypeScript: the CLI scaffolds the files, and most actions are one HTTP call wrapped in createAction.
Can I use a custom piece without contributing it to the public repo?
Yes. Build it into a .tgz archive and install it from the Pieces page by uploading the tar file, or publish it to your own instance with the publish command.
What is the difference between a community piece and a custom piece?
The CLI asks you to pick a type when you scaffold. Community pieces are meant to be shared and live under packages/pieces/community. Custom pieces are tailored to your own needs and live under packages/pieces/custom.
How do I test a piece before anyone else uses it?
Add the piece name to AP_DEV_PIECES in .env.dev, restart the backend, and refresh the browser. The piece appears in the flow builder, where you can run its actions and load sample trigger data.
Can an AI coding agent write the piece for me?
Yes, and the official docs call it the recommended way. The piece-builder skill teaches Claude Code or Cursor the project conventions, then scaffolds the piece, writes actions and triggers, and runs the build and lint.
Do custom pieces work with MCP?
Yes. Every piece you contribute becomes automatically available as an MCP server, so the same integration is callable from Claude Desktop, Cursor, or Windsurf.
Conclusion
A custom piece turns a fragile pile of copied fetch calls into one typed integration your whole team can reuse, and the manual path takes about 30 minutes once the dev environment is running. Start with the Gelato demo to learn the shape, then rebuild it against your real API.
Ask yourself this before you ship: if the vendor changes its auth tomorrow, is there exactly one place to fix it? If the answer is yes, the piece did its job. If you want the same integration callable from an AI client without Activepieces at all, read how MCP servers work and build a standalone MCP server in Python, and debug the MCP side with MCP Inspector. To compare automation platforms before you commit, see our complete n8n guide.
Frequently asked questions
Do I need to write TypeScript to build a piece?
Yes, pieces are TypeScript npm packages, and the framework is type-safe. You do not need advanced TypeScript: the CLI scaffolds the files, and most actions are one HTTP call wrapped in createAction. If you can write a fetch call, you can write an action.
Can I use a custom piece without contributing it to the public repo?
Yes. Build it into a .tgz archive with the CLI and install it from the Pieces page by uploading the tar file, or publish it to your own instance with the publish command. Contributing to the public repo is optional, and Activepieces rewards accepted pieces with extra monthly tasks on Cloud.
What is the difference between a community piece and a custom piece?
The CLI asks you to pick a type when you scaffold. Community pieces are meant to be shared with everyone and live under packages/pieces/community. Custom pieces are tailored to your own needs and live under packages/pieces/custom. The code is the same shape either way.
How do I test a piece before anyone else uses it?
Add the piece name to AP_DEV_PIECES in .env.dev, restart the backend, and refresh the browser. The piece appears in the flow builder, where you can run its actions, load sample trigger data, and watch real API responses before you publish anything.
Can an AI coding agent write the piece for me?
Yes, and the official docs call it the recommended way. The piece-builder skill in the Activepieces repo teaches Claude Code or Cursor the project conventions, then scaffolds the piece, writes actions and triggers, and runs the build and lint for you.
Do custom pieces work with MCP?
Yes. Every piece you contribute becomes automatically available as an MCP server, so the same integration is callable from Claude Desktop, Cursor, or Windsurf. The README states that all 280+ pieces are available as MCP servers.